
Before you even think about picking up a crowbar, let's talk about what really makes or breaks a new patio door installation. In my experience, success has very little to do with the final fitting and everything to do with the groundwork you lay beforehand.
Getting this prep stage right is non-negotiable. It’s the difference between a door that glides shut perfectly and one that’s draughty, misaligned, and a constant source of frustration.
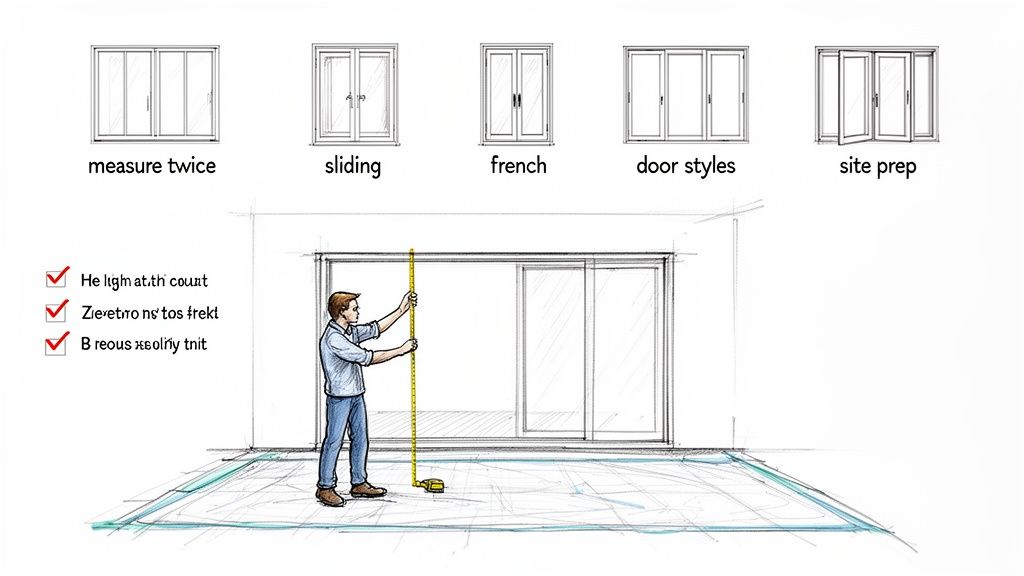
Think of this as your project blueprint. Taking the time to get these details sorted now will save you a world of headaches, preventing common but costly mistakes like ordering the wrong size door or running into trouble with local planning rules.
The old saying "measure twice, cut once" is an understatement here. An inaccurate measurement is the fastest way to derail your entire project.
To get it right, you need to measure the structural opening’s height and width at three separate points—top, middle, and bottom. Then, use the smallest of these three measurements for both your final height and width. This simple step accounts for any imperfections in the brickwork, ensuring your new door frame will actually fit into the opening.
One more pro tip: measure the diagonals of the opening. If the two diagonal measurements are identical, your opening is square. If not, you’ll need to factor this in and square it up during the installation.
With your measurements in hand, the next decision is the style of door. This choice will be shaped by your home's character, how much space you have, and how you want to live in it.
To help you decide, here’s a quick comparison of the three main types:
| Door Type | Best For | Space Required | Pros | Cons |
|---|---|---|---|---|
| Sliding | Uninterrupted views and modern homes | Minimal, as doors slide parallel to the wall | Excellent space-saver; allows for very large glass panels and lots of light. | Only half of the total opening can be used at one time. |
| French | Traditional aesthetics and creating a classic focal point | Requires clear space for doors to swing open (inwards or outwards) | Provides a wide, elegant opening; timeless appeal. | The central frame can partially obstruct the view when closed. |
| Bifold | Creating a seamless indoor-outdoor transition | Needs space for the folded panels to stack at one or both ends | Can open up almost the entire aperture; creates a "wall of glass" effect. | More complex mechanism; can be more expensive than other types. |
For those looking to make a real statement, bifolding doors create that incredible indoor-outdoor flow by folding away completely.
Before placing that order, you absolutely must check if your project needs planning permission.
For a straightforward, like-for-like replacement of an existing door, you generally won't need it. This usually falls under 'permitted development' rights.
However, the game changes if you are:
In any of those cases, you must speak to your local council's planning department first. A quick phone call is all it takes to avoid potential fines and the nightmare of having to undo all your hard work.
The final step is to get the area ready. A tidy site is a safe and efficient one.
Clear all furniture away from the door, both inside and out. Protect your floors and carpets with heavy-duty dust sheets—don't skimp here.
You'll also need a plan for the rubbish. The old door frame, glass, and any brickwork you remove can't just be left on the kerb. Looking into how to hire a skip ahead of time means you'll have somewhere to put all the debris, keeping your site clear and safe. With all this sorted, you’ll be ready to focus entirely on the installation itself.
With your new patio door on-site, it's time to tackle the first major task: getting the old one out. This is where patience really pays off. A rushed job here can easily damage your brickwork or interior plaster, turning a straightforward installation into a week of repairs. A methodical approach is the only way to go.
The exact process will depend on what you're removing – an old uPVC slider comes apart differently from a set of timber French doors. The core principles of safety and precision, however, are universal. Always start by getting the moving panels out of the way before you even think about touching the main frame.
First things first, get the doors themselves out. This makes the frame lighter and much easier to handle, and critically, it removes the risk of swinging doors or shattering glass while you work.
Once the door panels are safely moved out of the way, you can turn your full attention to the frame. It’s likely held in place by a combination of fixing screws, expanding foam, and layers of old sealant.
Your goal here is simple: release the frame from the wall without pulling half the wall out with it. The secret is to cut it free before you try to pry it out.
Start by running a sharp utility knife around the entire perimeter of the frame, both inside and out. This will break the seal from any old caulk, silicone, or layers of paint. Next, grab a reciprocating saw fitted with a metal-cutting blade and carefully slice through the fixing screws holding the frame to the wall. You’ll usually find them hidden under small plastic caps along the sides, top, and sill.
Here’s a tip from experience: cut the frame itself into smaller, more manageable pieces. Make a vertical cut through the centre of the sill and the head, and a horizontal cut through each side jamb. This relieves all the pressure and allows you to easily lever the sections out one by one with a crowbar, giving you far more control and minimising damage.
With the old frame gone, you’ll be left with a rough, empty hole. Resist the temptation to just slot the new door straight in. This opening is the foundation for your new door, and getting it perfectly prepared is non-negotiable for a professional, weathertight finish.
Start with a thorough clean. Use a scraper to get rid of every last bit of old sealant, stubborn foam, and loose mortar until you’re back to the clean brick or blockwork. Now, it's time for a proper inspection:
Your reward for this careful work is a clean, square, and structurally sound opening. This is the perfect stage for a smooth installation, guaranteeing your new patio door will look great and perform perfectly for years to come.
Right, with the old door gone and the opening cleaned up, we’re at the most important part of the job. This is where patience and precision pay off. Getting this frame installed perfectly is, in my experience, 90% of the battle for a patio door that glides effortlessly for years.
Honestly, don't rush this. A mistake here, even by a few millimetres, is what leads to sticking doors, annoying draughts, and that feeling that it’s just not quite right. A perfectly set frame is the absolute foundation of a quality installation.
By now, you should have a clean, prepped aperture ready for the new unit, having followed the key removal stages.
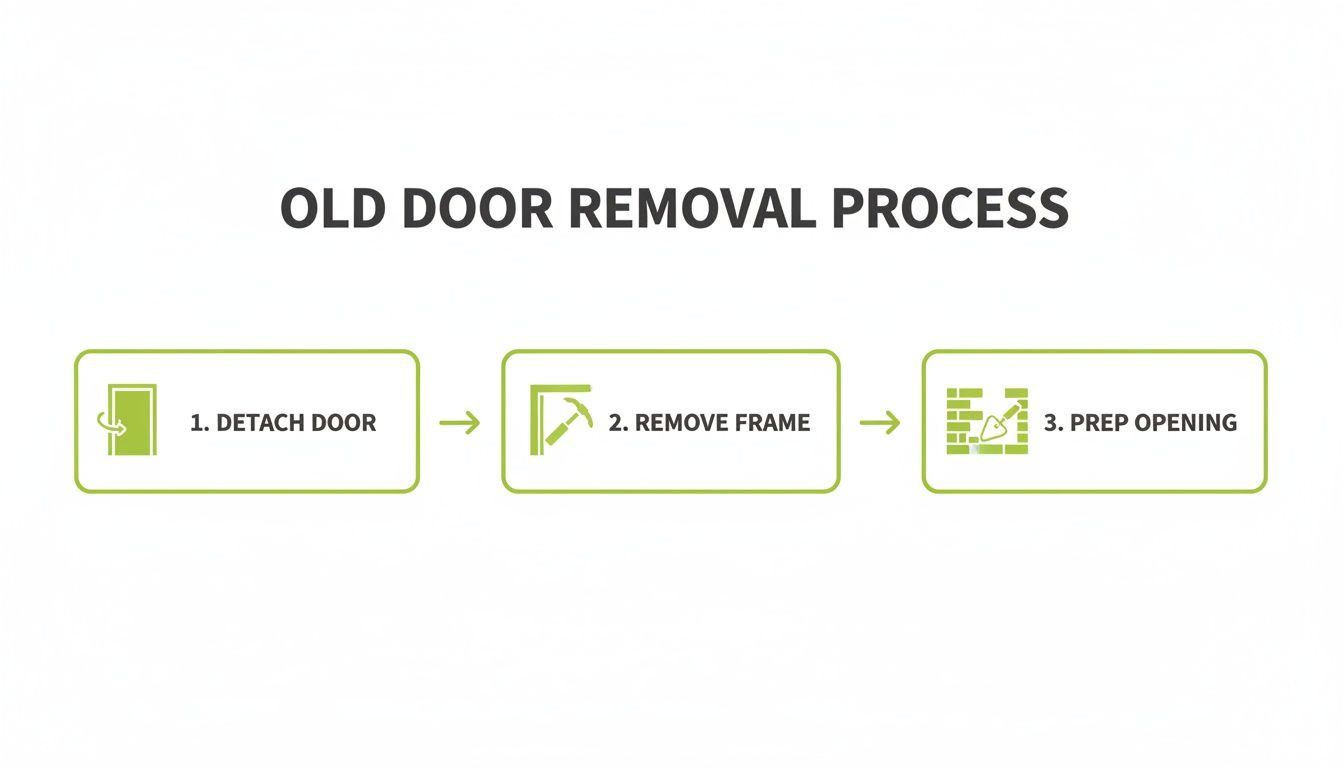
A clean opening like this is the only way to start. It gives you a solid base to work from and prevents a lot of headaches down the line.
Your first move is to carefully lift the new frame into the opening. You'll notice it's designed to be smaller, leaving a gap of roughly 10-15mm all the way around. This gap is deliberate and absolutely essential for making fine adjustments.
Using plastic packers, you’ll temporarily hold the frame in position. Start by setting packers on the damp-proof course (DPC) at the bottom, placing them directly under where the vertical sides (the jambs) will rest. Now, you can gently manoeuvre the frame into the opening, using more packers to maintain that consistent gap around the perimeter.
The aim here is to get the frame suspended perfectly in the centre of the opening, held steady just by the packers. No screws yet. This temporary setup is what gives you the control to get the alignment absolutely spot on.
This is the fitter's mantra. Your frame must be perfectly plumb (vertical), level (horizontal), and square (perfect 90-degree corners). Being even slightly out will cause all sorts of operational problems later.
Keep adjusting the packers patiently until you’ve nailed all three. It takes time, but it’s completely non-negotiable for a professional result.
Once the frame is perfectly positioned and held by packers, it's time to make it permanent. The type of fixing you use will depend on your wall construction, a common variable we see in properties across Leeds and Manchester.
Fixing points are critical. As a rule of thumb, place your first fixing 150mm from each corner, with subsequent fixings spaced no more than 600mm apart. Get all the fixings in but don't tighten them fully. Do one last check with your spirit level to ensure nothing has moved, then tighten them securely. Be careful not to overdo it, as this can easily bow the frame and undo all your careful work.
This is especially true for modern sliding door systems. Interestingly, recent market research on door trends shows that sliding patio doors have become the UK's top choice, outselling bi-folds in regions like Yorkshire. This trend towards maximising views with minimal effort hinges entirely on a perfectly installed, true frame.
With your frame securely in place, it’s time for the most satisfying part of the job: hanging the doors themselves. This is where your new patio door starts to look like the real thing, but it's a stage that demands precision and a bit of muscle.
This is where a second pair of hands isn't just helpful—it's essential. Door sashes and large glass units are deceptively heavy, and trying to manage them alone is a recipe for a damaged frame, shattered glass, or worse, personal injury. Always lift with your knees and communicate clearly with your helper.
How you get the doors onto the frame will depend entirely on the style you’ve chosen. The process for a sliding door is completely different from that for a set of French doors.
For Sliding Doors
This is a two-person lift, no question. The trick is to tilt the top of the door panel and guide it into the upper track of the frame first. Once it's seated, you can lift the whole panel up, which creates just enough room to swing the bottom over the sill and lower it gently onto the bottom track. You're looking for a solid 'clunk' as it settles into place.
Once it's on the track, you’ll need to adjust the rollers. You can usually find the adjustment screws in small holes on the side or bottom of the panel. A few turns with a screwdriver will raise or lower each corner, allowing you to get the door perfectly level and ensure it glides effortlessly without catching.
For French Doors
Here, it’s all about the hinges. While your helper supports the weight of the door leaf, your job is to align the hinges on the door with their counterparts on the frame. Simply slide the hinge pins in to connect them. Some modern doors use 'flag' hinges, where you lift the entire door onto hinge posts fixed to the frame. A good tip is to always hang the 'slave' door first—that's the one with the top and bottom shoot bolts.
With both doors hanging, check the alignment. Do they meet neatly in the middle? Is the gap around the edges consistent? If not, you'll need to use the three-way adjustment found on most modern hinges. These allow you to tweak the door's position up/down, left/right, and in/out to achieve a perfect, draught-free fit.
Your doors were likely delivered 'un-glazed' to make them manageable to lift. Now it’s time to fit the heavy, and very fragile, double or triple-glazed units. Always wear safety gloves for this part.
The technique for this is called "toe and heeling," and it's a critical skill professionals use to prevent the door from dropping or sagging over time.
This "toe and heel" method cleverly uses the weight of the glass to reinforce the door's shape. It’s a non-negotiable step for long-term performance. A well-glazed door is also a huge part of an energy-efficient home. In fact, improving energy efficiency is a major driver for homeowners, with a recent study finding that 48% of patio door sales were for replacements. Making the switch can reduce heating bills by 15-20%, a significant saving year after year. You can read more about the UK patio door market on sheerwaterglass.co.uk.
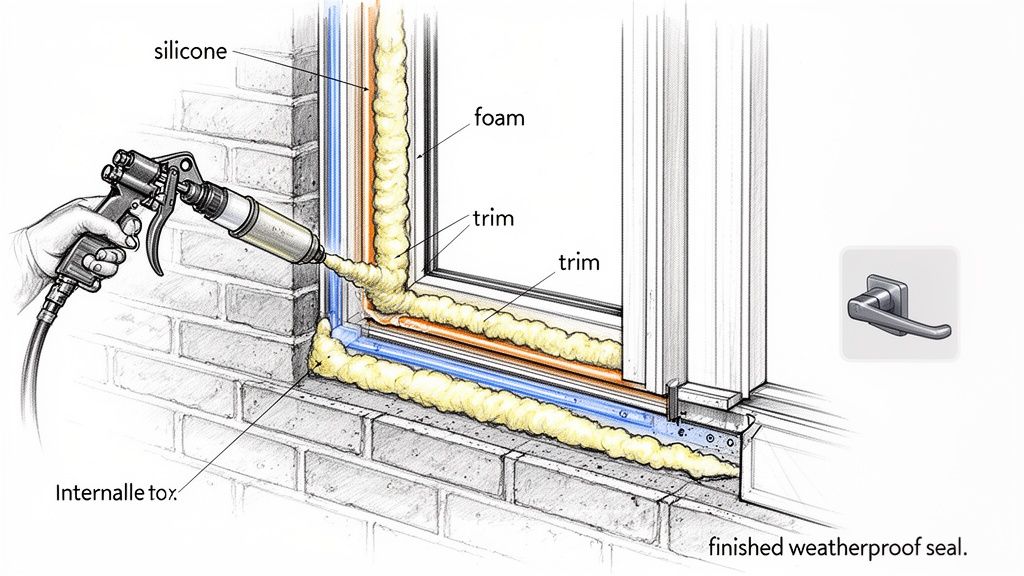
You’ve done the heavy lifting—the frame is plumb, the doors are gliding perfectly—but don't pack up your tools just yet. This final stage is what separates a decent DIY job from a professional-grade installation that will stand the test of time.
Getting the sealing and finishing right is about creating an impenetrable barrier against the British weather. A tiny gap or a poor seal can lead to frustrating draughts and water damage, undoing all your hard work. This is where we focus on weatherproofing, adding the final hardware, and running through a critical checklist before you can truly call the job done.
The first line of defence against rain and wind is the external seal between your new door frame and the surrounding wall. For this, you absolutely need a low-modulus silicone sealant. Don't be tempted by rigid fillers; this type of sealant stays flexible after curing, so it can expand and contract with the building as temperatures change without failing.
Applying sealant neatly is a skill, but a bit of prep makes it much easier. Make sure the gap is totally clean and dry. For that razor-sharp, professional finish, run masking tape along both the frame edge and the brickwork, leaving just the gap exposed.
Cut the sealant nozzle at a 45-degree angle to match the gap's width, then apply a smooth, continuous bead. Immediately after, you can smooth the bead with a wetted finger or a sealant finishing tool, then peel off the tape while the silicone is still wet. The result? A perfect, clean line.
Now, let's head inside. You’ll have a 10-15mm gap running around the internal perimeter of the frame. The best way by far to tackle this is with expanding foam, which offers fantastic thermal insulation and stops cold spots dead in their tracks.
A crucial tip when using expanding foam: less is definitely more. It expands massively as it cures, so you only need to fill the gap to about 50% of its depth. If you overfill it, the pressure can actually bow the door frame, completely ruining its operation.
Once the foam has fully cured (always check the manufacturer's timings), just take a long, sharp utility knife and carefully trim it flush with the internal wall.
With the door fully sealed, it's time for the finishing touches that bring the whole project together. This is when you'll fit the internal trims, handles, and locking mechanisms.
Choosing the right door hardware isn't just about looks; it's fundamental to security and daily use. A high-quality handle and lock feel more substantial and provide real peace of mind. Follow the manufacturer’s instructions to the letter when installing the handles and lock cylinder.
Next, measure and cut your internal trims—whether plastic or timber—to neatly cover the foam-filled gap. A strong grab adhesive will hold them securely. For a seamless join to the wall, run a thin bead of decorator’s caulk along the edges before painting. It’s these details that also get you thinking about how glass can transform other parts of your home, like modern glass doors and walls.
Before you stand back and admire your handiwork, a final, methodical check is essential. This is your chance to catch any minor snags before they become bigger headaches.
Work your way through this list:
Ticking off these final checks means your patio door installation is a complete success, adding comfort, security, and value to your home.
There's a great deal of satisfaction in completing a major DIY project, and fitting your own patio door is certainly an ambitious one. This guide gives you the steps, but true expertise also involves knowing your own limits.
Deciding to hand a job over to a professional isn't an admission of defeat; it’s a smart, calculated decision to protect your home and your investment. Sometimes, what seems straightforward on paper reveals itself to be far more complex once the work begins.
From our experience, certain situations can quickly turn a manageable DIY job into a costly nightmare. If you come across any of these, our advice is to put the tools down and pick up the phone.
Structural Surprises: You’ve taken the old frame out, and what you see is alarming. A cracked or sagging lintel, or worse, no lintel at all where there should be one. This isn't a door-fitting job anymore; it's a structural one that requires a professional builder, possibly guided by a structural engineer. Don't risk it.
Out-of-Square Openings: Older properties, particularly the beautiful character homes you find across Harrogate and York, rarely have perfectly square or level openings. Correcting a wonky aperture so a modern, precision-made door fits perfectly is a genuine skill that goes far beyond packing and shimming.
The Sheer Weight of It All: The scale of modern glazing can be deceptive. A large bi-fold door set or a triple-glazed sliding panel can weigh hundreds of kilograms. Without specialist lifting equipment and an experienced team, you risk serious injury to yourself and irreversible damage to the expensive new door.
A professional installer brings more than just muscle and tools to the job. They bring years of experience, a FENSA registration that proves their competence, and an insurance-backed guarantee for the work. For homeowners who value quality, whether for their doors or for projects like Glass Balustrades in Yorkshire or Glass Balustrades in Newcastle, using a certified professional is the only way to guarantee a first-class result.
Ultimately, hiring a professional like Glass Tech is about managing risk. It’s the difference between hoping for the best and being assured of a perfect, weatherproof, and secure installation that will last for decades. It's peace of mind, delivered and fitted.
Even with the best-laid plans, it’s completely normal to have a few questions before you get the tools out. We hear a lot of the same queries from homeowners tackling this project, so let's clear up some of the most common ones.
For a seasoned DIYer with a helper on hand, a simple like-for-like replacement is a full day's work. You should set aside somewhere between 6-10 hours, assuming the opening is structurally sound and you don't uncover any nasty surprises.
If you're creating a brand-new opening, however, the timeline gets much longer. It's also worth noting that our professional installers, with their specialised tools and daily experience, can often have a standard replacement wrapped up in just 4-6 hours.
In most cases, no. Swapping an old door for a new one of the exact same size usually falls under 'permitted development' here in the UK, so you won't need to get the planners involved.
Be warned, the rules change the moment you plan to create a new opening, make an existing one significantly wider, or if you live in a conservation area or a listed building. In any of these situations, you must speak to your local planning authority before a single brick is touched. This is a non-negotiable step, whether you're in Leeds or Newcastle.
There’s no single "best" material; the right choice really comes down to a balance of aesthetics, budget, and how much maintenance you’re willing to do. Each has its own strengths.
Ultimately, your decision will be a personal one, weighing up your home's style against your budget and long-term maintenance plans.
For a flawless, professionally guaranteed installation that enhances your home's value and security, look no further than Glass Tech. We manage every detail, from expert advice to a clean, efficient fitting, ensuring complete peace of mind. Contact us today to discuss your project.
A professional team of experts providing glass and glazing solutions covering the whole of Yorkshire & more...
Whether it's Leeds, York, North Yorkshire, Birmingham, Hull, Liverpool, Machester, Newcastle or Nottingham, get in touch to find out how we can help you with your bespoke glass project.