
Fitting a new shower enclosure can completely transform a bathroom. It's a job that feels immensely satisfying when you get it right, but a flawless, leak-free finish doesn't happen by accident. It all comes down to the prep work.
Honestly, the secret to a perfect installation isn't in the final sealant bead; it’s in the careful decisions and measurements you take before you even open the box. Rushing this stage is the number one reason DIY jobs go wrong, leading to wonky doors, frustrating gaps, and the dreaded persistent leak.
Let's walk through the essential planning phase to get you set up for a smooth, rewarding project.
First things first, you need to decide on the style of enclosure. This choice affects the look, the budget, and, crucially, how tricky the installation will be.
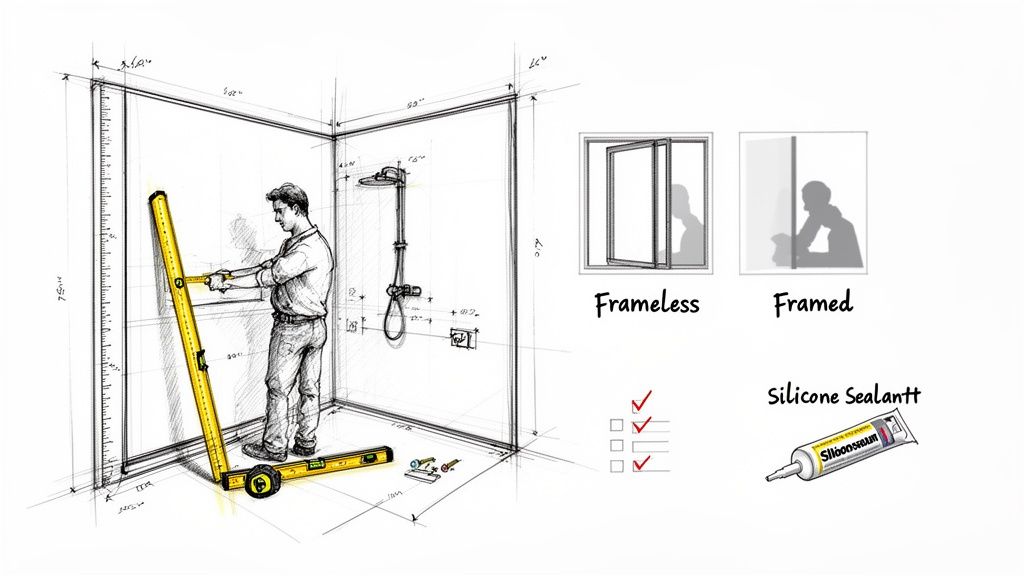
Here's a quick rundown of what you're choosing between, which will help you decide what’s right for your space and your DIY confidence level.
This table gives a quick comparison of the most popular shower enclosure styles to help you decide which is best for your bathroom.
| Feature | Frameless Enclosure | Framed Enclosure | Semi-Frameless Enclosure |
|---|---|---|---|
| Look | Minimalist, sleek, modern | Traditional, sturdy | A blend of modern and traditional |
| Glass Thickness | Thick (8-10mm) | Thinner (4-6mm) | Mid-range (6-8mm) |
| DIY Difficulty | High - requires perfect walls | Low - more forgiving | Moderate |
| Cost | Highest | Most affordable | Mid-range price point |
| Maintenance | Easiest to clean | More tracks/seals to clean | Fewer tracks than framed |
Ultimately, a framed enclosure is often the most forgiving for a first-timer, while a frameless one demands precision. Semi-frameless offers a great middle ground.
It's no surprise that homeowners are keen to get these upgrades right. The UK's bath fitting market, which was valued at USD 2.3 billion in 2023, is set to grow to £1.9 billion by 2033. This shows just how many of us across the UK are investing in quality bathroom spaces. You can find out more about the drivers behind the UK bath fitting market.
Get this part wrong, and nothing else matters. An error of a few millimetres is all it takes to end up with a panel that won't fit or a gap that's impossible to seal properly. This is especially true in the wonderful, character-filled older properties we have across Yorkshire and the North of the UK, where a perfectly square corner is a rare find.
Always measure at three points for any dimension—top, middle, and bottom for the height, and the same for the width. Always use the smallest measurement. That's your working number; it guarantees the unit will physically fit into the space.
Your spirit level is your best friend here. Check your walls to see if they're plumb (perfectly vertical) and that your shower tray is dead level before you do anything else.
A Tip from the Trade: If you're fitting a corner enclosure, use a builder's square to check the angle of the corner itself. If it’s not a perfect 90 degrees, don't panic. Look for an enclosure that has generous adjustment in its wall profiles. Many modern units offer up to 25mm of wiggle room, which is often enough to absorb the wonky walls of an older home.
There's nothing more frustrating than having to down tools halfway through a job to dash out for sealant or the right drill bit. It breaks your concentration and can lead to sloppy mistakes. Get everything you need laid out and ready to go before you begin.
Here’s a typical checklist of what you'll want on hand:
Nailing this planning stage is your best insurance policy against leaks, wonky doors, and a whole lot of frustration. It turns a daunting task into a series of manageable steps, ensuring your new shower looks like a pro fitted it.
You’ve chosen your new shower enclosure, and it’s sitting there, ready to go. Now for what I’d argue is the most critical part of the entire job: the preparation. Getting this stage right is the difference between a professional, leak-free finish and a world of headaches down the line. A bit of extra care here pays off massively.
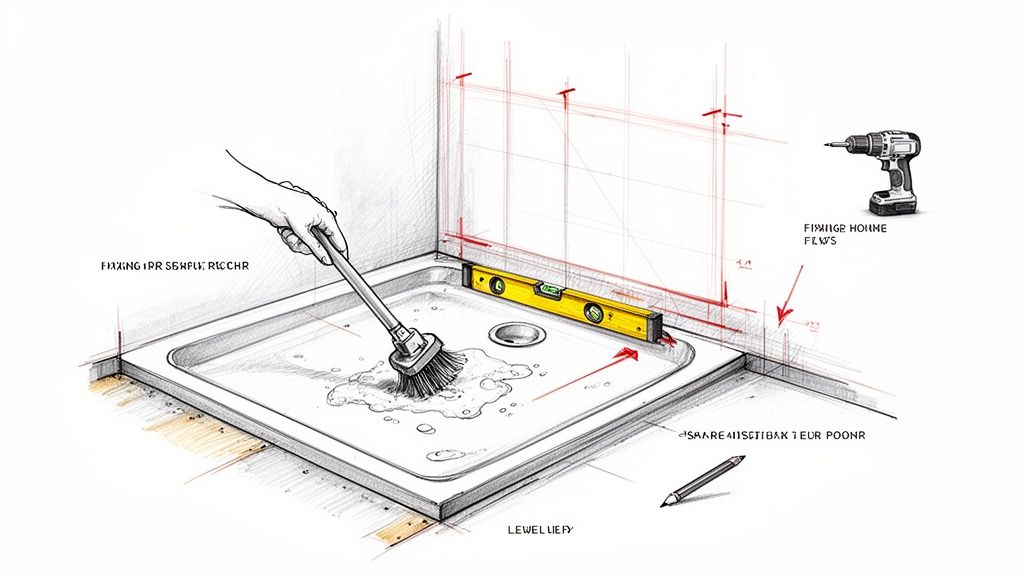
Before a single piece of that new enclosure touches the wall, every surface must be spotless. Any old sealant, dust, or soap scum will stop your new fixings and silicone from getting a proper grip. This isn't just a quick wipe-down; it's a full-on deep clean.
Start with the shower tray itself and the walls it’ll meet. Get a decent bathroom cleaner and scrub away all the grime. For stubborn old silicone, a dedicated removal tool and solvent are your best friends—honestly, don’t try to get by without them. Scrape it off carefully, then clean up any residue until the surface is perfect.
Once it's clean, grab a quality spirit level. Lay it across the top edges of the shower tray, checking it both along the width and the depth. It absolutely must be level. No ifs, no buts.
Next, hold that spirit level vertically against the walls where the enclosure’s frame will sit. Don’t be surprised if your walls aren't perfectly plumb. Many homes, especially the lovely older properties we see all over Yorkshire and the North of England, have walls that wander a bit.
A classic issue in homes from Leeds to Sheffield is dealing with walls that aren't perfectly straight. If your spirit level reveals a noticeable gap between it and the wall, you can't just ignore it. A small deviation of a few millimetres can usually be handled by the adjustment in the enclosure’s wall channels. For bigger gaps, you’ll need to pack out the wall profile. Always use plastic packers for this, never wood, which will just rot in a damp environment.
With clean and checked surfaces, it's time to mark up. This is a classic "measure twice, drill once" moment.
Carefully place the wall profiles from your kit against the walls. Using your spirit level again, get them perfectly vertical. This is crucial. The profile needs to be plumb, even if the wall behind it is doing its own thing.
Hold the profile steady and use a sharp pencil or a fine marker to mark the fixing holes onto your tiles. Getting this spot-on ensures the frame will be straight, which is essential for the doors and panels to hang and operate correctly.
Thinking about bathroom prep is also the perfect time to consider other jobs. The skills for securing an enclosure frame are very similar to other fixtures. For instance, this guide on how to install grab bars in your bathroom shares useful advice on wall preparation and finding secure fixings, which is all good practice.
Before you even think about picking up the drill, do one final check. Measure the distance between your pencil marks and compare them to the holes on the profile itself. This tiny step catches any slips and gives you the confidence that you're about to drill in exactly the right place. Taking this prep work seriously is what sets a top-quality DIY installation apart from a bodge job.
Right, the prep work is done. Now for the satisfying part: seeing your shower enclosure actually come together. This is where you move from planning to building. Forget wrestling with those baffling instruction diagrams for a moment. Let's walk through the assembly process with some real-world, practical steps. It’s all about being patient and precise, but get it right, and you’ll have a finish that looks every bit as good as a professional job.
All that careful measuring and site prep is about to pay off. This isn't just about slotting a few bits of metal and glass together; it's about understanding how each part contributes to a solid, stable, and watertight final structure. We'll cover everything from getting that first frame fixed to hanging the door perfectly.
The first job on the tools is fixing the wall profiles—those vertical metal channels from your kit—to the wall. These are the absolute foundation of the whole enclosure. Get this wrong, and nothing else will line up.
Using the pilot holes you drilled earlier, you can now fix the profiles to the wall. It’s crucial to use the specific wall plugs and screws that came in the box; the manufacturer has supplied them for a reason. When you're drilling into tiles, a good tip is to start with a smaller masonry bit to make a guide hole. This stops the larger bit from wandering and potentially cracking the tile.
As you drive the screws in, keep your spirit level pressed against the profile. It must be perfectly plumb (vertical). Don't trust your eye, and definitely don't assume your walls are straight—they rarely are. A channel that’s even a couple of millimetres out will cause major headaches later with wonky panels and doors that simply won't shut properly.
An Installer's Tip: Don't hammer the screws home just yet. Tighten them so the profile is firm against the wall, but leave just enough play for tiny adjustments. This gives you a bit of crucial wiggle room when you come to slide the glass in. You can give them their final tighten once you’re happy everything is perfectly aligned.
This is the part that makes most DIYers a bit sweaty-palmed: moving the heavy glass panels. Let’s be clear: this is a two-person job. No question. Toughened safety glass is incredibly strong on its face, but its Achilles' heel is the edges. One sharp knock against a tiled floor can cause the whole panel to shatter into a thousand pieces.
Here’s how to handle the glass like a pro:
With your wall channels loosely fixed, you can carefully guide the first fixed glass panel into its profile. It should slide in without too much force. If it feels tight, stop and check that the channel is still plumb and that there’s nothing obstructing it. Once the panel is sitting in the profile, get the spirit level out again. This time, check the glass panel itself is perfectly vertical.
Once the fixed panels are sitting happily in their wall channels, it's time to lock them in place. For most enclosures, this means drilling through the metal wall profile and into the frame of the glass panel, then securing it with the small screws provided. This is what gives the structure its rigidity.
Take it slow here. Double-check the panel is still plumb before you drill. A very common mistake is over-tightening these little screws. You want them snug and secure, but cranking down on them can distort the aluminium frame or strip the threads.
With the fixed panels solid, you can now hang the door. The exact method depends entirely on whether you have a pivot, sliding, or bi-fold door, so now is the time to pay close attention to the manufacturer's guide.
Whatever your style, this is another moment where a second pair of hands is essential. As soon as the door is on, test it. Does it open and close smoothly? Does it catch or scrape anywhere? Almost all modern enclosures have adjustment mechanisms, usually on the rollers or pivots. Spending a few minutes making tiny tweaks here is what separates a clunky door from one that glides shut with a satisfying click.
If you’re still weighing up your options, taking a look at the different types of modern glass shower screens and enclosures can help you understand how these mechanisms differ before you commit.
The last bit of the build is fitting the handles and any other cosmetic trim. This is usually straightforward, involving screwing the handle parts together through pre-drilled holes in the glass. Just be careful not to let the screwdriver slip and scratch the panel.
Before you even think about picking up the silicone sealant, do one final, thorough check of your work.
This methodical process—from getting your profiles plumb to making those final micro-adjustments—is the secret to a successful installation. From our experience fitting enclosures in homes across Yorkshire and the North, we know that taking your time at this stage prevents 90% of all future problems like leaks and wobbly doors.
You've done the hard graft, the enclosure is built, and it’s looking the business. But an expertly assembled shower is only as good as its seal. This final stage—making it completely watertight—is arguably the most critical part of the job.
Get this right, and you'll have a leak-free shower for years. Get it wrong, and you're in for a world of damp, mould, and frustration. Don't worry, sealing isn't some dark art. It just takes a steady hand and a bit of patience.
The basic assembly flow is quite simple, all leading up to this final, crucial step.
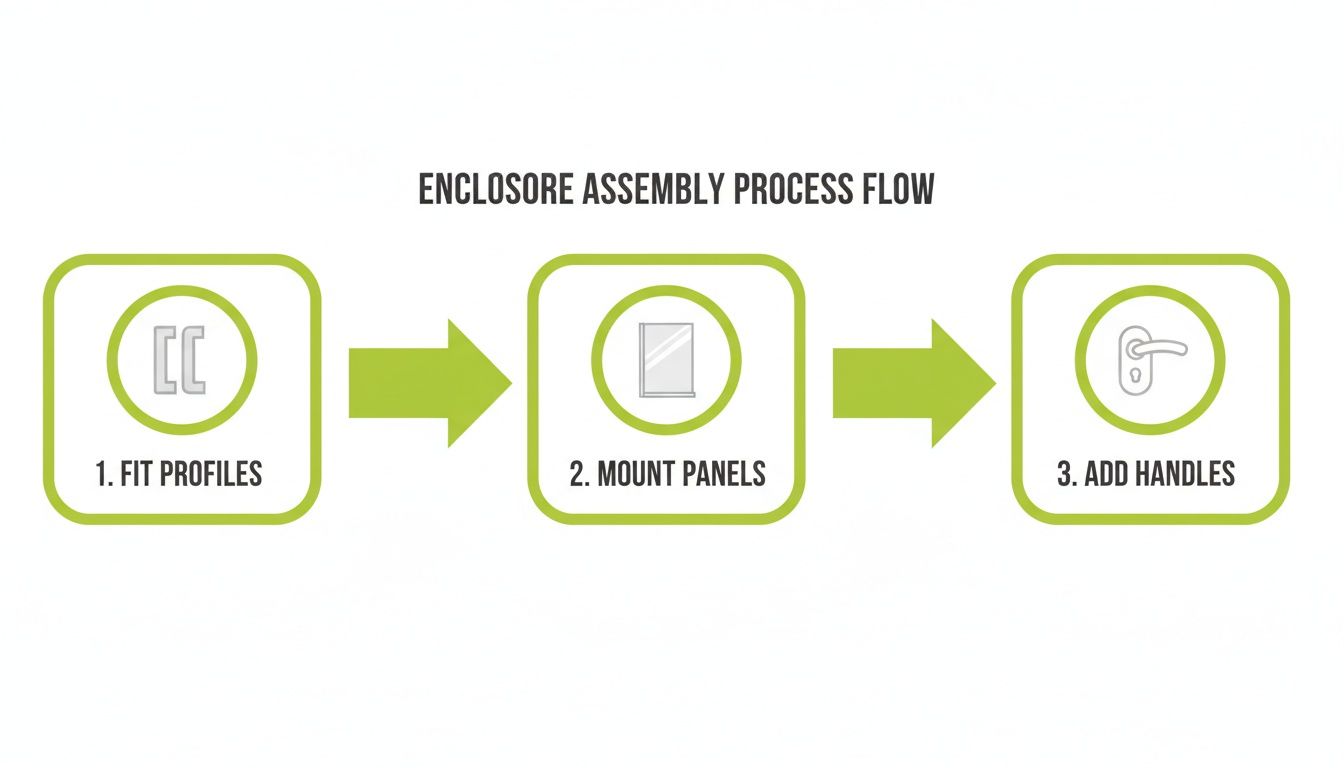
As you can see, a solid foundation—from fitting the wall profiles to mounting the panels—is what allows you to get that perfect final seal.
First things first: every surface where the sealant will go must be bone dry and spotlessly clean. Any speck of dust, grease, or moisture will stop the silicone from bonding properly, creating a weak spot that water will inevitably find. A final wipe-down with a microfibre cloth and a bit of methylated spirits does the trick perfectly.
Now for the most important rule I can give you: Only seal the outside of the enclosure. This might sound backwards, but trust me, it’s vital. You need to run a bead of sealant where the bottom of the frame meets the shower tray and where the vertical profiles meet your tiles—but only on the exterior.
There’s a very good reason for this. Any water that finds its way inside the channels of the frame needs a way to drain back out into the tray. If you seal the inside, you trap that water. It’ll just sit there, turning into a stagnant puddle that breeds black mould and causes the seals to fail.
Getting a neat, tidy bead of sealant is what separates a DIY job from a professional one. The secret is in the prep. Cut the nozzle of your silicone tube at a 45-degree angle, keeping the opening small—just a few millimetres wide. You want a small, controllable bead, not a huge dollop you have to clean up later.
Apply a continuous, steady bead along all the external joints. Don't stop and start if you can help it. Once it's on, you need to 'tool' it. This isn't just for looks; it smooths the bead and forces it right into the gap, ensuring a perfect, watertight bond.
You can buy a special sealant finishing tool, but here’s a trick of the trade that works just as well:
The soapy water stops the silicone from sticking to you, letting you shape a perfect, clean, concave finish. Have a damp cloth ready to wipe away any excess immediately.
With the sealant on, it’s time for the final bits that make all the difference. Fit all the screw-concealing caps that came in your kit. These little plastic covers hide the fixings and give the frame a clean, uniform look. Then, give the glass a final, thorough clean inside and out with a good glass cleaner to get rid of any smudges and fingerprints from the installation.
Now for the hardest part of the entire job: waiting. You must leave the silicone to cure fully before even thinking about using the shower. Most brands recommend waiting at least 24 hours. Use it too soon, and you'll wash away the uncured sealant and undo all your careful work.
Of course, all this effort assumes your walls were ready for the enclosure in the first place. Proper wall preparation is key, and if you're ever in doubt, this guide on how to waterproof shower walls is an excellent resource for making sure the area behind your enclosure is as watertight as the front.
It's no surprise that quality enclosures are becoming more popular. Homeowners across the North of the UK are realising they're a fantastic, lasting home improvement. The global market, valued at USD 3.51 billion in 2025, is projected to climb to USD 5.38 billion by 2030, showing just how much people are investing in great-looking, functional bathrooms.
Even with the most meticulous planning, a DIY project can sometimes throw a spanner in the works. It’s a frustrating moment—a door that just won’t close flush or a mysterious drip you can’t quite trace.
Drawing on our experience fitting shower enclosures in homes across Yorkshire and the North of England, we can tell you that most problems are common and, thankfully, have straightforward fixes.
The key is not to panic. Instead, you need to methodically work out the cause. Nine times out of ten, it’s a small issue of alignment or a minor sealing adjustment that’s needed. Let's walk through some of the most frequent snags you might hit and exactly what to do about them.
Discovering a puddle of water after your first test is disheartening, but it's usually an easy fix. The first job is to pinpoint precisely where the water is getting out.
At the Base: A leak where the frame meets the shower tray is the most common culprit. This almost always means there’s a gap in the external silicone seal. Dry the area completely, clean it with methylated spirits to ensure a good bond, and apply a fresh, continuous bead of sealant to the outside of the join.
Around Wall Profiles: If water is escaping where the vertical frames meet the tiled wall, it points to the same problem—a failed seal. Again, the solution is to dry, clean, and re-apply a meticulous bead of sealant to the exterior join only.
From Frame Fixings: Water weeping from a screw hole is a tell-tale sign that water has got inside the frame itself. This often happens if the inside of the enclosure was sealed, which traps water and forces it out wherever it can. The only real fix is to carefully remove the interior seal, let everything dry out completely for a day or two, and then rely solely on your robust external one.
A shower door that scrapes on the tray, sticks, or leaves a gap when closed is a classic sign of an alignment issue. This usually stems from the frame not being perfectly square or plumb during the initial assembly.
Before you think about unscrewing the main frame, check the door itself. Most modern shower doors have adjustment mechanisms built right in. Look for small screws on the door rollers or pivot blocks. Making tiny, quarter-turn adjustments can raise, lower, or shift the door by those few crucial millimetres, which is often all it takes to get that perfect, satisfying fit.
If adjusting the door doesn’t solve it, you may need to slightly loosen the main panel fixings, nudge the frame into perfect alignment using your spirit level, and then re-tighten everything securely. This is where leaving that tiny bit of play in the screws during assembly really pays off.
Accidents happen, and finding a chip or crack in a glass panel during installation is a major setback.
While a tiny chip on an edge might be repairable with a specialist resin kit, any significant damage means the panel’s integrity is compromised. If a panel breaks or you discover a crack, do not proceed with the installation. A damaged panel is a serious safety risk and must be replaced.
For anyone facing this unfortunate issue, using a specialist glass replacement service is the safest and most reliable path forward.
These challenges are all part of the learning curve. But with a cool head and a methodical approach, you can overcome them and still achieve that professional finish you’re aiming for.
There’s a real satisfaction in a DIY job well done, and this guide is designed to give you that feeling. But the mark of a truly savvy homeowner isn't just knowing how to use the tools—it's knowing when to put them down.
Deciding to call in a professional isn't admitting defeat; it’s a smart move to protect your investment and your home. While a standard enclosure on a level tray is well within a confident DIYer's grasp, some situations demand a seasoned hand.
Think about the unique character of many northern UK properties. A bespoke frameless screen for a loft conversion with a sharply angled ceiling, for instance, requires millimetre-perfect measurement and cutting. Or perhaps you're dealing with an older home where the floor has a significant slope—getting a tray and enclosure perfectly level and sealed in that scenario is a true test of experience. High-end wet rooms also require specialist waterproofing knowledge that goes far beyond a simple tube of silicone.
For these more complex projects, bringing in a specialist offers more than just an extra pair of hands. It provides complete peace of mind. You’re getting a guaranteed watertight finish, assurance that every detail complies with building regulations, and a flawless result that will stand up to years of daily use.
The bathroom market is also evolving. The United Kingdom's Smart Bathroom Market is projected to grow at a CAGR of around 9.25%, well ahead of the standard shower market's 6.3% growth. This move towards integrated technology means professional installation becomes even more valuable, ensuring your new enclosure is perfectly set up for any smart features you might want to add down the line. You can read more about the expanding smart bathroom market.
For homeowners in the North, from Newcastle to Manchester, seeking premium results for complex glass installations, a survey-to-installation service is the best way to ensure perfection. It takes the guesswork out of the entire process, from precise measurements to flawless fitting.
Ultimately, if your project is non-standard, structurally complex, or involves high-value materials like custom-cut glass, calling in a professional is a wise investment. If your plans involve intricate designs or you're aiming for that truly high-end, architectural finish, we can help.
Feel free to contact our team to discuss your plans.
When you're fitting a new shower enclosure, a few questions always pop up. Here are some of the most common ones we hear from homeowners across Yorkshire and the North of England, along with our straight-talking advice based on years of experience.
If you're a competent DIYer, you can realistically expect a standard installation to take somewhere between four and eight hours. This can shift a bit, of course, depending on how complex your chosen enclosure is and, crucially, the state of your walls.
Our best advice? Always block out a full day for the job. There's nothing worse than rushing.
And remember, once the fitting is done, you absolutely must let the silicone sealant cure for a minimum of 24 hours. Don't be tempted to use the shower before then.
Honestly, this is a huge leap in difficulty from a standard framed unit. While it's technically possible, the solid glass panels are seriously heavy, and the tolerances are razor-thin. Your measurements and alignment have to be spot-on, with no room for error.
We've seen it all in older properties, from Newcastle right down to Nottingham, and beautiful period homes often come with beautifully uneven walls. For frameless designs, we always recommend calling in a professional. It’s the only way to be certain of a secure, perfectly aligned fit that will stand the test of time.
It all comes down to the silicone sealing. Get this right, and you're golden. Get it wrong, and you're in for a world of headaches. Your success hinges entirely on how and where you apply that sealant.
Tooling the sealant to create a smooth, concave finish isn't just for looks—it's what creates a strong, watertight bond. This simple but vital step is the secret to a leak-free shower for years to come.
For contemporary glass features designed and fitted to perfection across Yorkshire and the North of the UK, look to Glass Tech. Our team provides expert advice and meticulous installation for stunning results. Find out more about our bespoke glass services.
A professional team of experts providing glass and glazing solutions covering the whole of Yorkshire & more...
Whether it's Leeds, York, North Yorkshire, Birmingham, Hull, Liverpool, Machester, Newcastle or Nottingham, get in touch to find out how we can help you with your bespoke glass project.