
When you're designing a new kitchen, the choice between an upstand and a splashback might seem like a minor detail, but it’s one of those decisions that profoundly shapes both the look and practicality of your space. One offers a subtle, finishing touch, while the other provides maximum protection and can act as a stunning focal point.
So, how do you decide which is right for your home? Let's break it down.
Choosing between an upstand and a splashback really comes down to what you need from your kitchen walls, your personal style, and of course, your budget.
Think of it like this: an upstand is the crisp, finishing border, whereas a splashback is the hardworking, statement piece. One is about seamless style, the other is about robust protection.
To help you see the key differences quickly, here’s a simple side-by-side comparison.
| Feature | Upstand | Splashback |
|---|---|---|
| Primary Purpose | Creates a neat, sealed join between worktop and wall. | Protects the wall from splashes, grease, and heat. |
| Typical Height | 10-15cm | Covers the area from worktop to cabinets, or even the full wall. |
| Coverage | Minimal; a decorative border. | Maximum; covers a large, targeted area. |
| Best For | A continuous, seamless look; hiding uneven wall gaps. | High-splash zones like behind hobs and sinks. |
| Aesthetics | Subtle and understated. | Can be a bold, decorative feature. |
| Cost | Generally more budget-friendly. | Varies widely based on material and size. |
This table gives a great overview, but the best solution often depends on how you actually use your kitchen.
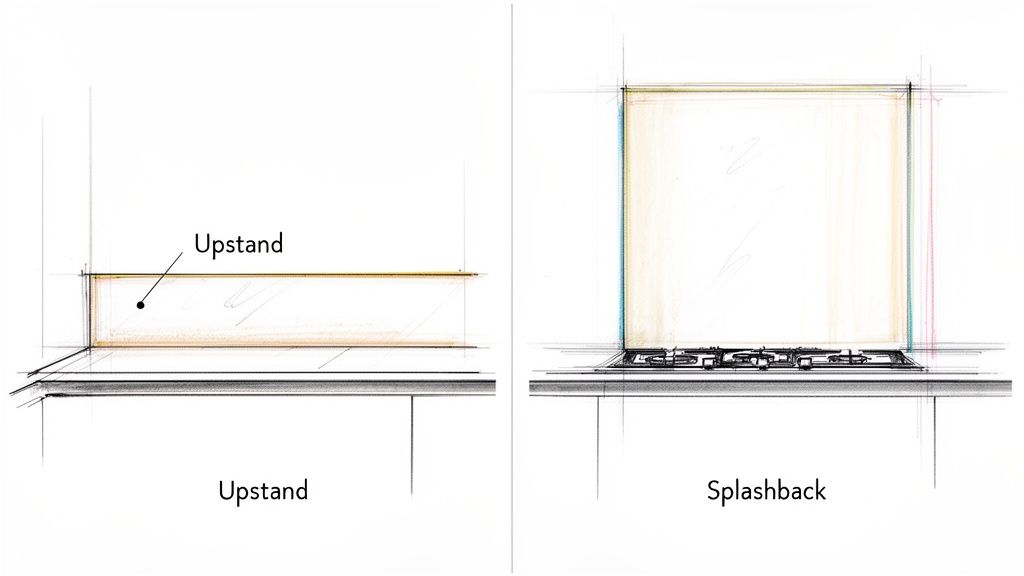
Let’s get into the specifics. An upstand is a short, slim strip of material, usually cut from the same slab as your worktop, that runs along the back of it. Typically standing about 100mm to 150mm high, its main job is to create a clean, watertight seal. It brilliantly hides the small, uneven gaps that almost always exist where a perfectly straight worktop meets a not-so-perfect wall.
A splashback, on the other hand, is a much larger panel. Its purpose is purely functional: to shield your walls from the daily onslaught of cooking. Think grease splatters behind the hob, water splashes behind the sink, and all the mess in between. Splashbacks offer serious protection and can run from the worktop right up to the underside of your wall cabinets, or even to the ceiling for a dramatic effect.
This flowchart can help you decide based on your main priority.
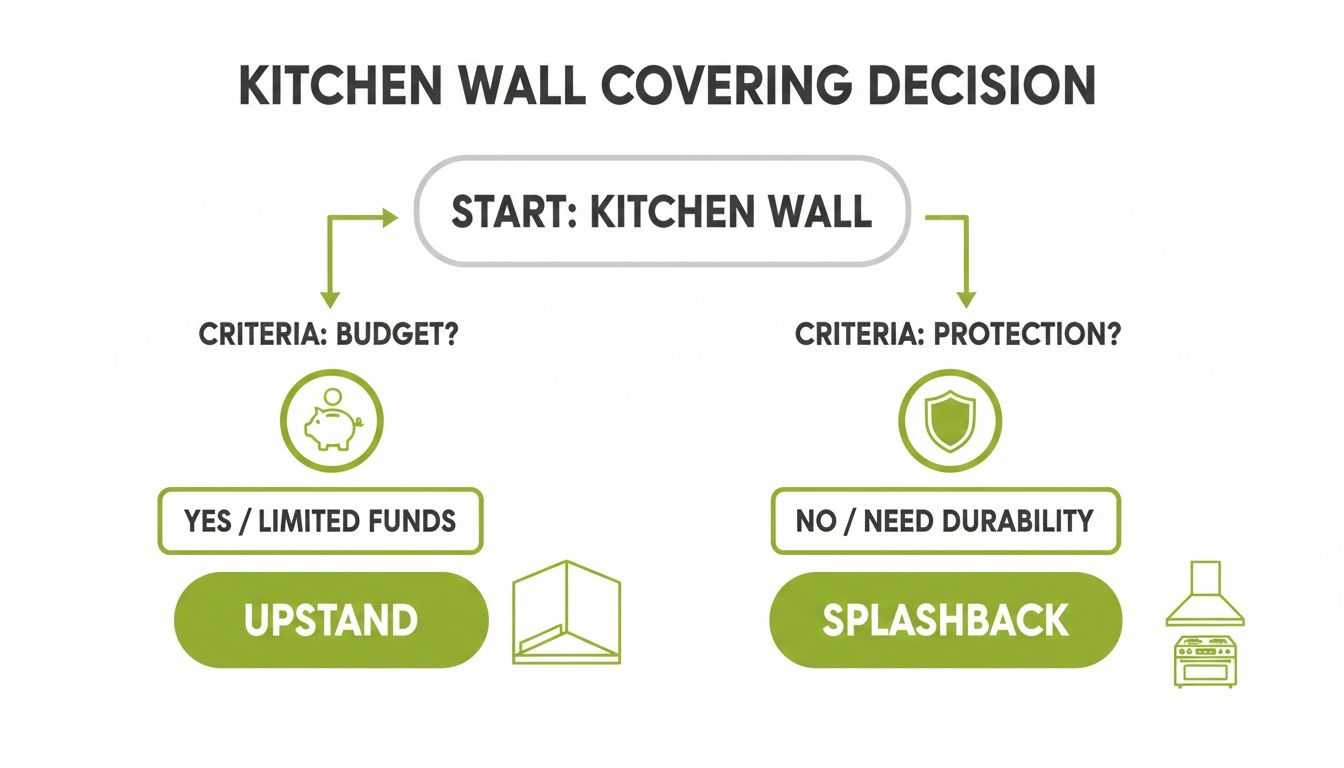
As you can see, if budget is the main driver, an upstand is a smart choice. But if you're after serious, easy-to-clean protection, a splashback is the way to go.
Luckily, you don’t always have to pick one or the other. In fact, one of the most popular and practical solutions we see today is a hybrid approach that combines both.
You can run a discreet upstand around the entire perimeter of your worktops for that clean, continuous finish, and then install a feature splashback only where you need it most. A stunning, easy-to-clean glass splashback behind the hob is a classic example. It protects the wall from cooking grime while adding a pop of colour or a sleek, modern finish.
This combination gives you the best of both worlds: the seamless look of an upstand and the heavy-duty protection of a splashback, all while creating a balanced and thoughtful design. It’s a reflection of a wider trend in home renovations, which has seen the UK's worktop and surfacing industry grow to a market size of £1.7 billion. Homeowners across the country, from Yorkshire to Newcastle, are investing in these high-quality finishes to create kitchens that are as functional as they are beautiful.
Deciding on the materials for your upstand and splashback is about more than just protecting your walls—it's about defining the very character of your kitchen. It's a choice that sits at the intersection of practicality and personality. Get it right, and the result can be a seamless, elegant backdrop or a breathtaking focal point.
Let's walk through the most common materials, starting with the options that create a beautiful harmony with your worktop, before diving into the modern favourite for splashbacks: toughened glass.
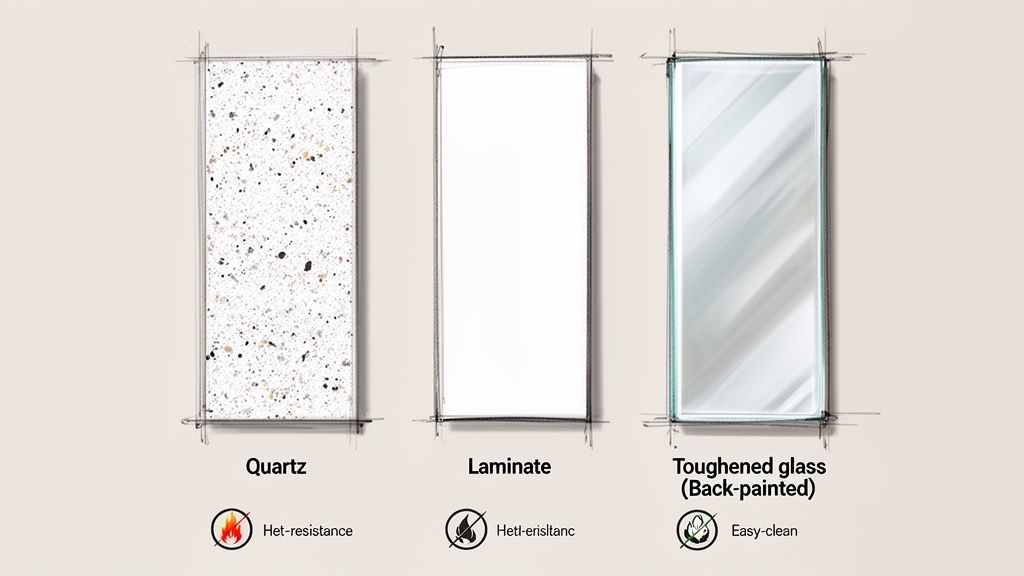
For a truly integrated and sophisticated feel, nothing beats matching your upstand to your worktop. Using the same material creates a continuous, unbroken line from the work surface up the wall, giving a neat, professionally finished look.
Here are the go-to choices:
These materials are fantastic for that clean border around your work surfaces. But when you need to protect the high-action area behind your hob, a different hero usually steps in.
When it comes to splashbacks, especially for the high-impact zones behind the hob and sink, toughened glass has firmly established itself as the top choice for discerning homeowners across the UK. Its popularity has skyrocketed in places from Glass Balustrades Yorkshire to Glass Balustrades Newcastle, where clean aesthetics and easy living are key. Unlike tiles, a glass splashback is one smooth, uninterrupted surface.
The real magic of a glass splashback is its completely non-porous and grout-free surface. This simply means there's nowhere for splashes of grease, grime, or mould to get a foothold. It's exceptionally hygienic and incredibly simple to wipe clean with a cloth and a bit of glass cleaner.
Toughened glass is also specifically made for the demands of a kitchen. It’s heat-resistant up to 400°C, which means it can be fitted right behind any hob—gas, electric, or induction—with zero risk of it cracking or changing colour.
This is where the fun really starts. Beyond all its practical plus points, glass gives you a level of creative freedom that other materials just can't match. A bespoke glass splashback lets you step away from the everyday and craft something that’s a true reflection of your style.
The design possibilities are almost limitless:
This customisation ensures your upstand and splashback combination isn't just a functional afterthought, but a central part of your kitchen's story. Of course, picking materials is just one step; for a more detailed look at the entire process, this guide on The Art Of Kitchen Backsplashes: How To Choose And Install The Perfect One offers some excellent insights. Whether you're in York or Leeds, the right materials can turn your kitchen into a bright, modern, and effortlessly stylish space.
This is where the real character of your kitchen begins to shine. The choice between an upstand, a splashback, or a combination of the two is far more than a practical decision—it’s a defining design statement. It’s what separates a kitchen that simply works from one that truly feels like the heart of your home.
Whether you’re aiming for a clean, minimalist feel or a bold, dramatic focal point, these elements are what turn your vision into a daily reality. The choices you make here will shape the entire atmosphere of the room.
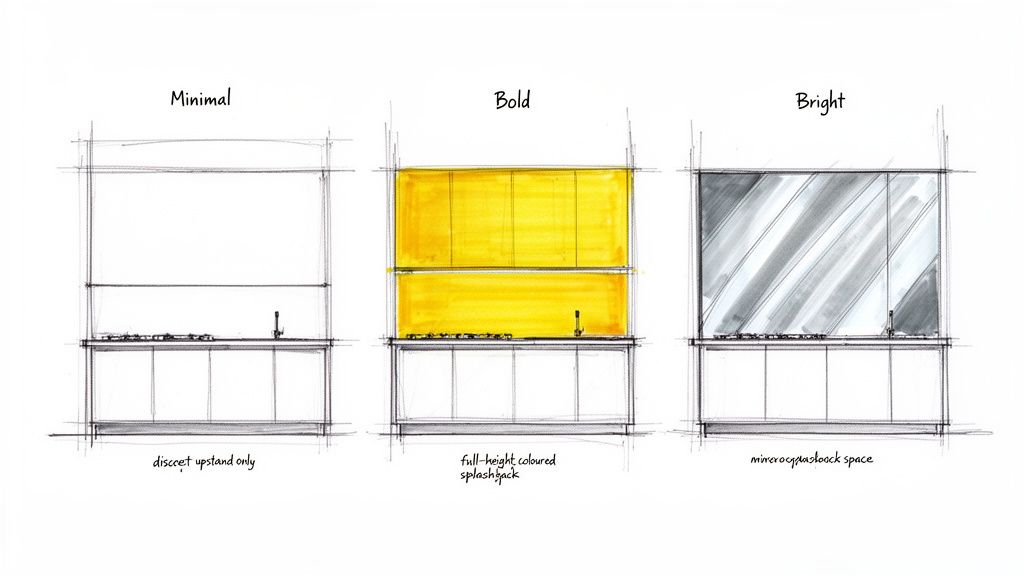
How you pair an upstand and splashback has a massive impact on your kitchen’s overall style. For a subtle, sophisticated look, a simple upstand that perfectly matches your worktop is an excellent choice. It creates a seamless, tidy line around the room, allowing other features like your cabinetry or flooring to take the spotlight.
On the other hand, if you want to make a statement, a full-height coloured glass splashback is the way to go. It instantly becomes a centrepiece, drawing the eye and injecting a shot of vibrant colour. This creates a sleek, contemporary backdrop that can elevate the entire space.
We’re seeing homeowners use these elements in some brilliantly creative ways to solve common design problems. In a compact terrace house kitchen in Hull, for instance, a mirrored splashback can be a complete game-changer. It bounces light around the room, creating an illusion of depth that makes the whole kitchen feel brighter and more spacious.
Another fantastic approach is using ultra-clear, low-iron glass to protect a painted or wallpapered feature wall. This lets you show off a favourite colour or pattern behind the hob without worrying about cooking splashes ruining it. It’s all about getting that perfect aesthetic without sacrificing practicality. Our team loves getting stuck into these kinds of bespoke glass projects, turning clever ideas into a beautiful, functional reality.
The splashback is no longer confined to a small patch behind the hob. We’re seeing a real shift towards more ambitious, integrated designs that create a huge impact.
One of the most striking trends is taking the splashback material right up to the ceiling. This creates a seamless, floor-to-ceiling feature wall that looks absolutely stunning and is incredibly practical and easy to keep clean.
Other popular ideas we’re installing include:
This growing appetite for decorative yet highly functional materials is a huge driver in the industry. The UK countertops market, which is closely tied to the upstand and splashback sector, is projected to hit USD 18,590.4 million by 2035. This growth is powered by homeowners, especially in our core areas from Yorkshire to Nottingham, choosing materials like glass for their seamless, hygienic, and stylish properties.
Whether you lean towards a sleek glass finish or a more classic material, it’s a key part of your design. Exploring different looks, such as popular subway tile backsplash ideas, can help you see how different textures and patterns come together. Ultimately, this is your chance to make the kitchen a space that is uniquely yours.
Achieving that perfect, seamless finish for your upstand and splashback all comes down to one thing: precision. The journey from your initial idea to the final fitting can seem a bit daunting, but once you understand the key stages, you'll see why professional expertise is the secret to a flawless result.
It's a process built on millimetre-perfect measurements. This is absolutely critical for bespoke glass splashbacks, which are often cut to accommodate everything from double sockets and light switches to cooker controls. Unlike tiles that can be tweaked piece by piece, a single panel of glass offers zero room for error.
Bringing your design to life follows a clear, logical path. Each step is there to make sure the final product not only looks incredible but fits your space like a glove. Think of it as a collaboration between you and your chosen installer.
The key stages generally break down like this:
The survey, or templating, is where the old saying "measure twice, cut once" is put into practice with incredible precision. This isn't a quick once-over with a tape measure. It's a meticulous process where a specialist creates a perfect digital or physical template of your wall space right there in your home.
During this visit, the specialist will:
This template becomes the definitive blueprint for making your glass. Any tiny mistake at this point leads to a poor fit, which is exactly why DIY attempts on bespoke glass can become risky and expensive very quickly. A professional survey is your guarantee that the finished piece will slot into place perfectly.
Think of it like commissioning a bespoke suit. You wouldn't provide your own rough measurements and hope for the best; you'd have a tailor meticulously measure every angle to ensure a flawless fit. The same principle applies to a custom glass splashback.
Once the template is finalised, it's sent over to the workshop. For a glass upstand and splashback, this is where the toughened glass is cut to size, the socket holes are created, and all the edges are polished for a smooth, safe finish. If you’ve opted for a bold colour, this is also when our specialists will expertly back-paint the glass.
The final stage is the installation itself. Our expert fitting team will return to your home to install the finished panels. They start by ensuring the wall surfaces are perfectly clean and prepared before applying a specialised, low-modulus silicone adhesive. Using the right adhesive is vital, as it creates a powerful bond without reacting with the paint on the back of the glass.
The team will carefully position the panel, make sure it’s perfectly level, and then seal all the edges to create a completely waterproof barrier. It’s this professional touch that makes all the difference, preventing moisture from getting behind the panel and ensuring a durable, stunning finish that will look fantastic for years to come. This is the level of care we bring to projects across the UK, from Glass Balustrades Yorkshire to homes in Newcastle.
You've settled on the perfect colour and material for your new upstand and splashback. But getting that showroom finish isn't just about the product—it's about the hands that fit it. The final installation is what truly brings your vision to life, and choosing the right local expert is the difference between a good result and a flawless one.
For homeowners across Yorkshire, Newcastle, and Manchester, there's a real advantage in partnering with a trusted local specialist over a faceless national chain. You get a more personal, accountable, and high-quality service from a team that values its reputation on your doorstep. But how do you find a true craftsman you can rely on?
When you start gathering quotes, you need to be able to separate the seasoned professionals from the rest. A reputable company will welcome your questions and provide clear, confident answers. Don't be afraid to dig into the details; this is your kitchen and your investment.
Here are the critical questions every installer should be able to answer:
Do you offer a complete template and fit service? For any bespoke glass, this is non-negotiable. A company that handles everything from the initial measurement to the final fitting takes full responsibility for the entire project.
Is your glass toughened to British Standards? Any glass installed behind a hob must be toughened for heat resistance and safety. Make sure they work to BS EN 12150 standards.
What’s your experience with tricky kitchens? Ask to see a portfolio of their previous work. You're looking for proof they can expertly handle uneven walls, awkward corners, and precise cut-outs for sockets and switches.
What type of adhesive and sealant do you use? This is more important than it sounds. For coloured glass, they must use a low-modulus, neutral-cure silicone. The wrong type can react with the colour backing and ruin the finish over time.
Working with a local, family-run business often provides benefits that big national companies simply can't match. When you choose a company that's part of your community, whether in Yorkshire or the wider North, you’re not just another order number. Their reputation is built on your satisfaction.
A trusted local specialist offers an end-to-end solution. They provide expert advice, conduct the templating themselves, often fabricate the glass in their own workshops, and use their dedicated team to carry out a spotless installation. That accountability at every single stage is your best guarantee of quality.
They also bring invaluable local knowledge. Our team, for example, has spent years working with the unique character and quirks of properties right across the region. This deep experience in precision and bespoke solutions is evident in all our glass installation work, including projects like our Sheffield glass balustrades.
This local expertise ensures that from the first phone call to the final polish, you get a service built on craftsmanship and genuine customer care. Finding that true partner for your project is the key to transforming your kitchen with a stunning new upstand and splashback.
You’ve got the big picture for your new kitchen sorted, but it’s often in the final stages that the smaller, practical questions start popping up. It's completely normal. We hear these queries all the time, so we’ve put together some straightforward answers to help you finalise your design with confidence.
This is a question we get all the time, and the short answer is: often, yes. It can be a brilliant, fuss-free solution.
As long as your current tiles are solid, flat, and securely fixed to the wall, we can usually install a new glass splashback directly over the top. The big advantage here is avoiding the mess, dust, and time it takes to hack off old tiles and then make good the wall behind them.
But it’s not a one-size-fits-all answer. The condition of your tiles is crucial. If the surface is too uneven or the tiles are loose, it could affect how well the adhesive bonds to the wall or even create stress points in the glass. That's why a professional survey is so important—an expert will take one look and tell you the best way forward for a perfect, lasting finish.
Honestly, this is one of the best things about choosing glass—keeping it clean is almost effortless. For daily wipe-downs, a soft microfibre cloth with a bit of standard glass cleaner or even just warm, soapy water is all you’ll need. A quick wipe is enough to get rid of cooking splashes and bring back that sparkling, streak-free shine.
The real beauty is in what a glass splashback doesn’t have.
Just be sure to avoid using any harsh, abrasive scouring pads or chemical cleaners, as they could scratch the beautiful surface over the years.
A glass upstand and splashback transforms one of the most tedious kitchen cleaning jobs into a simple, satisfying wipe. The smooth, uninterrupted surface ensures your kitchen stays looking pristine with minimal effort.
The final cost will always depend on your specific kitchen, but as a general rule, an upstand is usually the more budget-friendly choice. This is especially true if it’s made from the same material as your worktop (like quartz or laminate), as it uses less material and is simpler to fit.
A full-height, bespoke toughened glass splashback is a bigger investment, but that price reflects what you get: complete protection, a high-end design feature, and endless customisation. The final quote for a glass splashback will come down to a few things:
While a glass splashback has a higher upfront cost, most of our customers find that the easy maintenance and incredible durability provide fantastic value for years to come.
Knowing the timeline is key to planning your whole kitchen project without any stress. From the day we visit for a survey to the moment your stunning new glass is installed, the entire process typically takes around 2 to 4 weeks. This schedule allows for the careful, step-by-step work needed to create a truly bespoke piece.
Here’s a quick breakdown of what happens during that time:
This managed timeline ensures that every single piece, whether it’s for a kitchen in Newcastle or a home needing Glass Balustrades Yorkshire, is made to the highest possible standard for a flawless result.
Ready to transform your kitchen with a stunning, practical glass feature? The team at Glass Tech has over 20 years of experience delivering bespoke glass solutions across Yorkshire and the North. Contact us today for a no-obligation quote and expert advice.
A professional team of experts providing glass and glazing solutions covering the whole of Yorkshire & more...
Whether it's Leeds, York, North Yorkshire, Birmingham, Hull, Liverpool, Machester, Newcastle or Nottingham, get in touch to find out how we can help you with your bespoke glass project.